|
Making images smaller is a tricky business. If you've found this article you've likely seen firsthand what can happen during image resizing -- patterns appearing on your images, distortion around the edges of shapes, blurriness, etc. Fortunately, creating thumbnails is a common operation and a number of techniques and algorithms have been developed to fix these undesireable effects, also known as artifacts. This article will cover three of the most common artifacts and present solutions for them.
The Bicubic Filter
In many cases, good results can be achieved using the Bicubic filter. This filter provides a good balance of speed and image quality. To use the Bicubic filter when resizing an image, use the following code:
Dim ImgGen
Set ImgGen = Server.CreateObject("SoftArtisans.ImageGen")

' ... Load an image and figure out how large it should be

ImgGen.ResizeImage width, height, saiBicubic, 1
The Bicubic filter maps the location of a target pixel in the smaller image to a location in the original image and uses the values of nearby pixels to estimate a value for the target pixel. This is the same basic operation as the Nearest-Neighbor and Bilinear algorithms. The difference is that the Bicubic filter uses more pixels (sixteen) than the Nearest-Neighbor or Bilinear filters (one or four).
There is one significant problem with the Bicubic filter, though. When it is used on images that contain small repeated lines such as brickwork, fences or wooden houses it can create a moiré effect. An example of this effect is shown below:
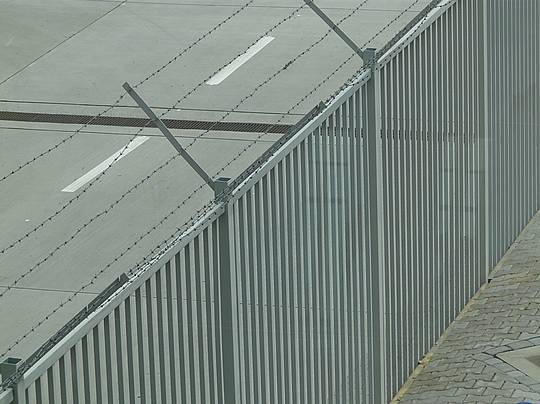 Original, unscaled picture of a fence
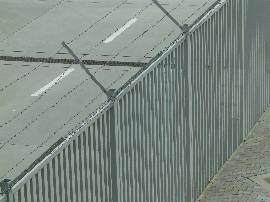 That picture resized with the Bicubic filter. Note the unsightly artifacts (moiré effect).
Solutions to the Moiré Problem
In version 1.09 of ImgWriter, SoftArtisans added a number of new filters to the resizing algorithm that can be used to eliminate the moire problem. The three best filters to use are the Sinc filter, the Lanczos filter, and the B-Spline filter. Here is the same image scaled with each filter:
 The Bicubic filter
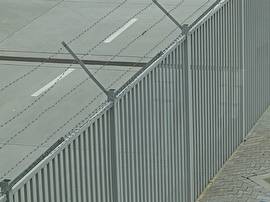 The Sinc filter
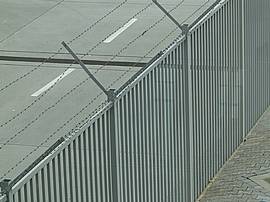 The Lanczos filter
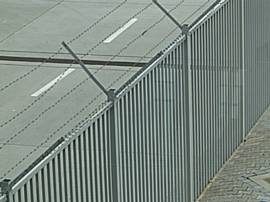 The B-Spline filter
Each of these filters, while solving the moiré problem, have some other effects on the image that need to be corrected for. The most obvious problem is that they all blur the image to varying degrees. In order to counteract this, the images above were sharpened after resizing. The Sinc filter often darkens images, so I brightened the output of that one slightly. The code that created those images follows:
imgGen.LoadImage infile
imgGen.ResizeFilter = 5
imgGen.ResizeImage 270, 0, saiFilterImage, 1
imgGen.SharpenImage 70
imgGen.SaveImage 0, 3, "out\FenceSmallBSpline.jpg"

imgGen.LoadImage infile
imgGen.ResizeFilter = 8
imgGen.ResizeImage 270, 0, saiFilterImage, 1
imgGen.SharpenImage 30
imgGen.SaveImage 0, 3, "out\FenceSmallLanczos.jpg"

imgGen.LoadImage infile
imgGen.ResizeFilter = 10
imgGen.ResizeImage 270, 0, saiFilterImage, 1
imgGen.SharpenImage 10
imgGen.ChangeBrightness 1.2
imgGen.SaveImage 0, 3, "out\FenceSmallSinc.jpg"
There are a few things to note about this code. First is that they all use the same filter argument in the call to ResizeImage. The saiFilterImage argument tells ImgWriter to resize the image using the filter indicated in the ResizeFilter property. This property is a number from 0 to 13 that indicates which filter to use. A list of all possible filters and the numbers they correspond to can be found in the documentation.
The second thing to note is that each filter gets sharpened (and brightened) a different amount. The amount of blur that a filter will introduce changes depending on a number of factors, including how much smaller the thumbnail is than the original and how many edges (where blur is most noticeable) the image has in the first place. Experiment with different amounts of sharpening on different images to get a result that looks good.
Finally, note that ResizeFilter is set before calling ResizeImage. The section in the documentation that covers the ResizeFilter property shows it being set after calling ResizeImage. This is incorrect and will lead to using the wrong filter. Always set the ResizeFilter property before calling ResizeImage.
Other Common Pitfalls
In addition to moiré effects, there are other downsizing artifacts you may encounter. One common one is a grid superimposed on the image after it has been processed. The image below shows this grid clearly on top of the car after it has been downsized.
 The car before resizing with ImgWriter
 The car after resizing with the default Bell filter. Note the lines drawn on top of the image.
 The car after resizing with the Lanczos filter.
This effect most often occurs when using the default value for ResizeFilter (4) and scaling an image to around three-quarters of its original size. The solution is to use either the B-Spline or Lanczos filters that were introduced in the last section. Unfortunately, the Sinc filter will sometimes produce this effect too, so it is best to stick to the Lanczos or B-Spline filters to resolve it.
Another source of poor quality images is creating multiple thumbnails from the same image. Every downsizing operation, no matter how advanced the algorithm is, is a lossy operation. This means that some information about the picture must be discarded every time it is resized. After resizing an image once, this information loss is minimal. If you resize the same image multiple times, for example to create multiple different sized thumbnails from the same source image, the information loss from each operation can be compounded and introduce artifacts into the final image. The following picture shows an image of some trees that was downsized twenty times with the Lanczos algorithm.
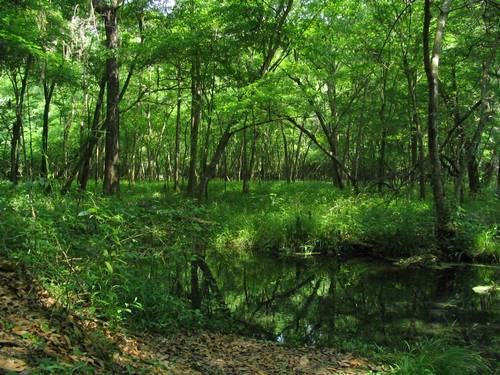 Original image of some trees
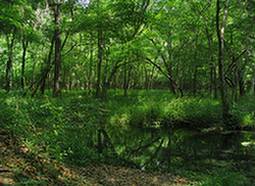 Image downsized twenty times
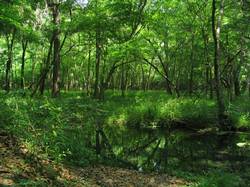 Image downsized once to the same size
Even though the Lanczos algorithm is very good, using it many times can damage an image. When you need to produce multiple versions of the same image at different sizes, you should call LoadImage before every call to ResizeImage. This will ensure that you always use the original copy of the image when you resize, so any error introduced in previous downsizings will not be compounded. Loading the original image many times will take longer, but it will produce much better looking images.
These are three of the most common artifacts that can be introduced into an image after downsizing it. By using some of the more advanced algorithms included with ImgWriter, we can fix these problems, usually at the cost of the operations taking longer to run. In situations where image quality is paramount, that tradeoff is acceptable.
All three images used in this article were downloaded from the Wikimedia Commons and are used under their respective licenses.
The image of the fence is used under the Creative Commons Attribution ShareAlike 2.5 license.
The image of the car has been released into the public domain.
The image of trees is used under the Creative Commons Attribution ShareAlike 3.0 license.
|
