|
Adding an XFile control to your .NET WinForms application can be a very simple process by using the toolbox in Visual Studio 2003. The following example will show you how to create a simple file download application using XFile.
First, you will need to right-click on the toolbox and select "Add/Remove Items…"
from the context menu. Here you should see a dialog listing all available controls that can be added to the Toolbox (Figure 1).

Figure 1 - Customize Toolbox Dialog
Click on the "COM" tab and check the boxes next to the following controls:
Note: The controls listed here are for XFile Standard Edition. If you are using
XFile Enterprise Edition, the names will start with SAXFileEE.
-
SAXFile File Transfer Progress ActiveX Control
- A predefined progress indicator that you can place onto your Form to track the status of an upload or download.
-
SAXFile FileDownload ActiveX Control
- A listbox that will handle all requests for downloading the listed files. This is the control used in this example.
-
SAXFile FileUpload ActiveX Control
- A listbox that will handle all requests for uploading the listed files.
| Note: |
If these are not displayed in the list, then they have probably not been registered as COM objects. Either re-run the installation for XFile or follow the directions to manually install XFile described in the documentation (accessible here). |
|
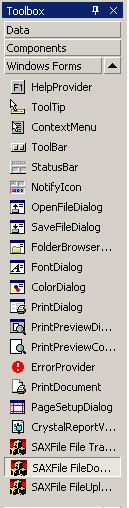
Click the "OK" button and you should see three new items added to your toolbox (Figure 2).
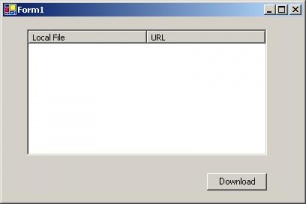
Drag the "SAXFile FileDownload ActiveX Control" onto your form and customize it to properly fit with your other controls. Also, add a button named "downloadButton" to your form. Your form should now look similar to the one in Figure 3.
|
Figure 2 -
XFile Controls in Toolbox
|
Figure 3 - XFile Download Form |
The next step is to add functionality to your form. First, add some files to download to your XFile Download Control. This can be done dynamically, but for this example we will hard code the URLs of the files we'd like to download.
|
VB.NET
|
Public Sub New()
  MyBase.New()

  'This call is required by the Windows Form Designer.
  InitializeComponent()

  'Prompt the user to select a directory to download to
  fileDownloadItem.XFRequest.SaveLocationPromptType = 2

  'Add some files to download
  fileDownloadItem.AddFile
("XFileDoc.chm", "http://support.softartisans.com/docs/XFile/saxfile.chm")
  fileDownloadItem.AddFile
("ds_softartisans.pdf",
"http://officewriter.softartisans.com/download/ds_softartisans.pdf")

End Sub
|
|
C#
|
public XFileDownloadForm()
{
  // This call is required by the Windows Form Designer.
  InitializeComponent();

  // Prompt the user to select a directory to download to
  fileDownloadItem.XFRequest.SaveLocationPromptType = 2;

  // Add some files to download
  fileDownloadItem.AddFile
("XFileDoc.chm", "http://support.softartisans.com/docs/XFile/saxfile.chm");
  fileDownloadItem.AddFile
("ds_softartisans.pdf",
"http://officewriter.softartisans.com/download/ds_softartisans.pdf");
}
|
The final step is to add a handler for the download button's Click event. This method will start the download process for the files listed in the AXFFileDownload control.
|
VB.NET
|
Private Sub downloadButton_Click
(ByVal sender As System.Object, ByVal e As System.EventArgs)
Handles downloadButton.Click

    downloadButton.Enabled = False

    fileDownloadItem.Start()

End Sub
|
|
C#
|
private void downloadButton_Click(object sender, EventArgs e)
{
    downloadButton.Enabled = False;
    fileDownloadItem.Start();
}
|
All that is left to do now is build your
project and test it. You now have a basic XFile download
application.
|

